
I am at the age where al ot of my family and dearest friends are celebrating their 25th wedding anniversaries. I am one that has celebrated this milestone too! My cousin and her hubby are the latest lovebirds celebrating, and a surprise 25th was planned for them, and I volunteered to create the centerpieces. Shortly after I volunteered this, I got nervous, wondering what the heck was I thinking? I always do this to myself, volunteer, then worry about if I can do it…. well I am happy to report I did it, and I am very happy with the result!
I wanted something with their photo, to make it more personalized. Plus some of the guests had not been at original wedding, and I thought it would be cool to see photos from actual wedding. So I contacted the Moms of the lovebirds, and got lots of wedding photos. I scanned these wedding photos in, and then looked for something to put them on.

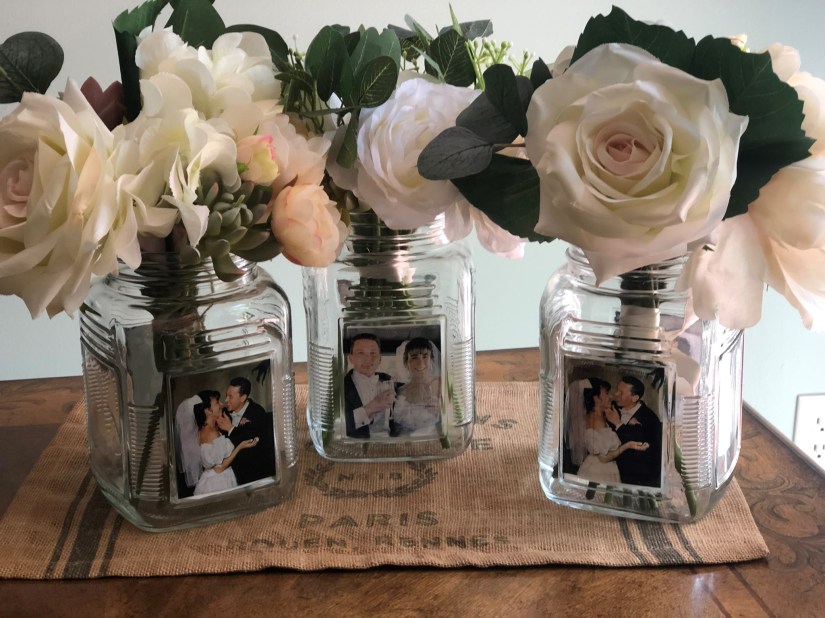
I luckily found some lovely glass jars at Christmas Tree shops. They were perfect! They had that country look, but also had a large flat side which would be perfect for a photo!
I then asked on a wonderful face book group called Image Transfer Artists, for some advice on how to get a photo on these jars. They had lots of suggestions, but I went with the one that was to use transparent stickers then apply them to the jars. I ordered them from Amazon, and then used Photoshop to make them to the size of the squares on the jars. I put one on a jar to try it, and it was very transparent. Like stained glass. So I decided to paint the rectangle white, so it had a background. This worked perfectly! I also recommend printing them out and letting them sit to dry overnight. Or more. They take a while to dry. And some still seemed tacky to the touch. I have to add you have to be very careful, as they do also scratch easily.

Once applied I decided they needed a spray of sealer. So I took a piece of thick clear plastic, cut out a rectangle the same size as photo, and taped it to side of jar, and sprayed.


Now came the hardest part! What to put in them…… I wanted to do fresh flowers, but did not realize you had to order them pretty early. So I had missed the boat on that sadly. I visited a local grocery store, who told me to come back on Thursday as that’s when they would have a fresh delivery. In the meantime, I needed some painting supplies at Michaels, so my daughter and I stopped in at our local store. And there were some pretty bouquets, artificial on sale for 60% off. Jackpot!!
My daughter and I picked through and got the exact number of bouquets we would need, with a few extra. What a deal…. now I would not have to worry about what variety of fresh flowers were at store, or if they would bloom in time, or how they would look. Instead, I would have a pretty centerpiece that would last forever, not need water and not wilt. Thank you Michaels. My daughter and I took each bouquet apart, removed tags and placed them in each jar. Then we positioned them, cut ends so they fit jar nicely, added an extra flower if needed, then wrapped them with some twine or a ribbon. Once they were done, we dropped them into jar. So now no one had to worry about rearranging them.

Below is the finished product! I am happy to report they weree a big hit with everyone. On our way home, I told my hubby how I was happy everyone liked them. And he replied that he was not surprised as everything I create always comes out well.
Isn’t he a keeper?
Hope this inspires you to create something as well!