
You have an idea for a book and now need to know how to proceed. First off, congratulations on having an idea! That is actually pretty wonderful because no book can be started without it. I know that after I finish a book, I always worry about whether another idea will come.
The first step I would suggest is to format your book. I create my books in Microsoft word. Yes, people will tell you that you need InDesign and other expensive software. And they are probably right, but honestly new authors do not typically have the funds to purchase all this software. Being a swamp Yankee and thrifty, I figured out how to create my books with word, photoshop elements and procreate. All quite reasonable products.
But back to word. Unfortunately, this is where you must make a decision that you would probably rather make later. And that is the size of your book. I suggest going with something standard and easy to mail. And then sticking with that size so all your books are the same size. You don’t have to; I just think they look nice this way when put all together.
So to decide on your size, perhaps visit a bookstore or library and do some research on what size you like. And once you pick a size visit the kdp page to settle on the size.
To choose a book size please visit here: Set Trim Size, Bleed, and Margins (amazon.com)
Once you pick your size, you must setup your file. I suggest visiting here to see for yourself anything I may have missed. The link brings you to amazons own set up page with videos and lots of help.
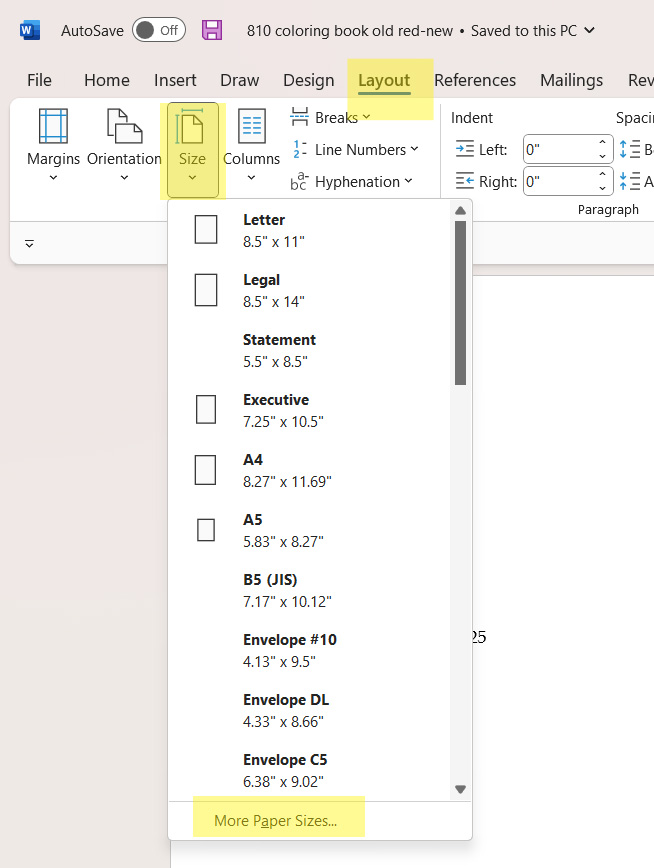
If you want to simply press on, please open your word document and set up the page size. The image below shows where to go. When you setup your word file, you have to set margins up for bleed. Bleed is the how the image goes to the edge of page so when book is trimmed there is no white or missing images. Later you will see the bleed when you do a preview in kdp when proofing your book. But that is much later, lets return to setup! Follow the image below and set up your book. Most of the time it is picking a size and adding .125 to the page.
For instance, I create 8 x 10 books. So my page set up is 8.13 (.125 rounds up to .13) by 10.25. Why is the it .25? Because you have to double it for the top and bottom bleeds.
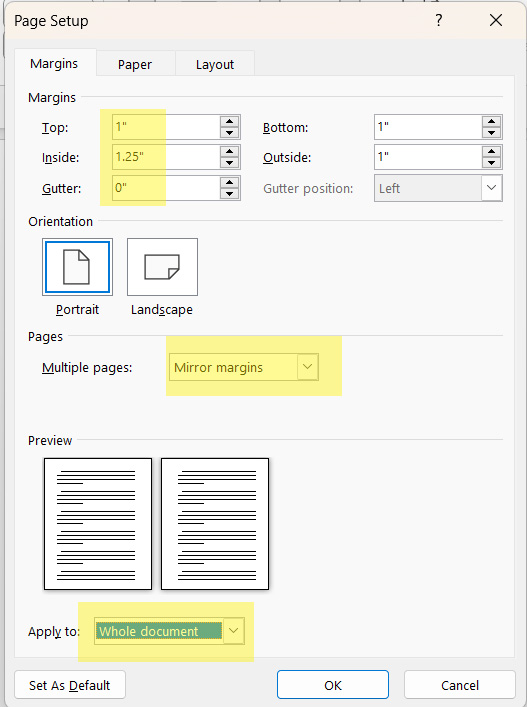
Below is the dialog box when it opens up, and the yellow shows where you have to input your information. DO NOT miss the bottom! Sometimes this is only set to the page you are on. And it is a problem if half your document has the wrong size.

The last thing I have set up is for margins. Here is the dialog box for that. Again, please do not miss the whole document box.
Once you have set your document up, you should be ready to go!
Now you must decide how many pages. A book length should typically be divided into 4 to work correctly. I think amazon does not worry too much about this, but if you plan on going to other distributors, printers it could be possibly a problem. I set my books to 32 typically.
So now it is time to finally do the fun stuff!

Your first page should be set up as the title page, this is where you also will sign your book when asked. Then copyright page and then dedication page. You can also combine these pages as well. I set mine up like this, so my first pages are a spread.
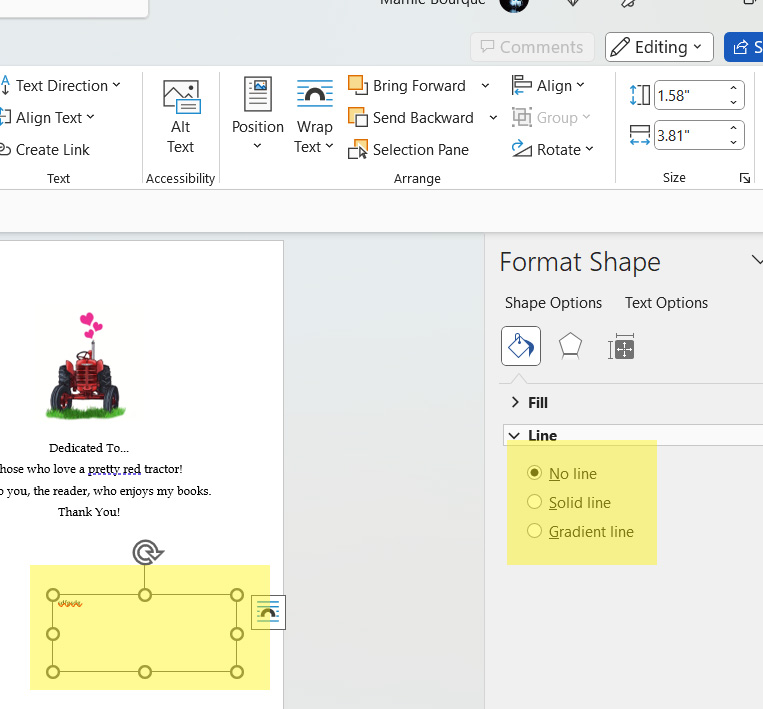
I also set up my text as text boxes so that I can move the text where I want it.
Go to insert, then text box. Sometimes it will come with a line around it. If it does right click on the box and then format shape. Hit no line and it will disappear.
As for illustrations, if possible, have your illustrator create your images to the document size. I find that this helps with your text placement as well. If you cannot get the illustrator to crop you can do it yourself using photoshop elements. Elements is basically a slimmed down version of photoshop that is much cheaper. It can be tough to learn, but you can learn a lot through YouTube tutorials.
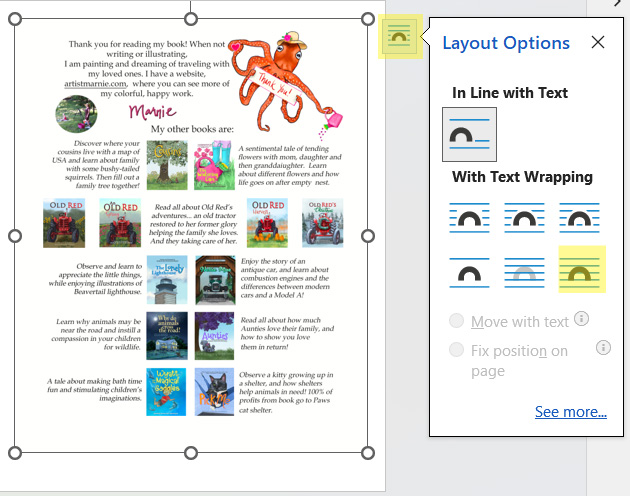
When you insert the image, right click on it, hit the little icon that pops up, (highlighted in yellow)then click on the lower right icon. This puts your image in the middle of page and makes it possible to easily adjust it to fit the page. I will typically right click on the image, then use the little circles to make it fit to page.
Both cover and manuscript should be in pdf format. You can easily export from word to pdf. To export to a pdf go to file, then export. *** Make sure to have folders and a place to export to that you will be able to find your files later.
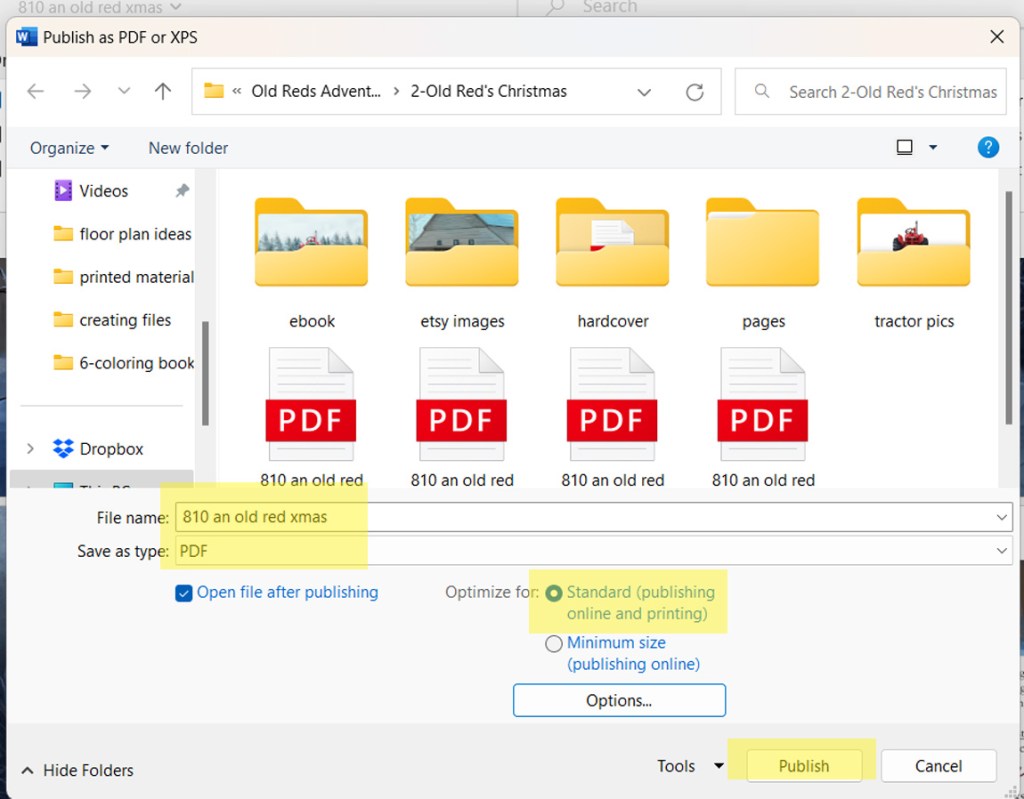
Sometimes you will need text embedded in your pdf file. To do this go to the “options” tab and click on the boxes shown.

Your cover file needs to be a separate pdf as well. Once both files are ready, you will head to the KDP site and upload them to your bookshelf.
So those are some of the tricks that I have learned along the way, and I hope that they help you as well! If you have any questions, please comment below or contact me and I will do my best to answer.
As always the most important advice I have to give is…
There are tons of information online in Facebook groups and other places. And me! Don’t be afraid to ask for help.
Good luck with the creation of your book!
More blogs to help you self-publish!
1-Do you need help beginning to self publish? Click here!
2-A publisher has contacted you? Are they a Vanity publisher? Click here to learn more!
3-Ready to start your files? Here is a blog that will help you set them up! Click here!
4-Need tips for finding an illustrator for your book? Click here!
5-What is a blurb? Click here for help creating one!
6-Feeling overwhelmed? This post will get you moving… Click here to get started!
7-Your book is done! Do you need an author page in your book? Yes you do! Click here to see the reasons why.
7a- How to upload your book to KDP… the actual platform that you publish from! Click here to visit!
8- Your masterpiece is complete! How do you get printed copies of your book? Click here for some ideas!
9- If you have published on amazon you need to advertise! Click here for tips!
10- Want to submit your book to a literary agent? Click here for info!
Need an illustrator? I have illustrated many books of my own and other authors. Please visit my website by clicking here, to contact me or see examples of my work.
If I have helped you and you feel inclined to purchase a book of mine, please click here to visit amazon. Thank you!
I am also available for hire to help you publish! If interested, please contact me at artistmarnie@yahoo.com.
